Extensions
An extension is a DLL file which must be placed near the CPL24Inventory.exe. Most of the extensions need a additional configuration, e. g. URLs and credentials, so that the extension knows where to connect to and with which credentials.
All configuration data is saved in a protected config file (*.pcfg) near the extension.
A extension always provides a TUI (text user interface) for configuration with appropriate commands.
To start a configuration you have to call CPL24Inventory.exe with the -TUI switch, followed by the extension name.
To list all available TUIs just call:
.\CPL24Inventory.exe -TUIYou get an output like these

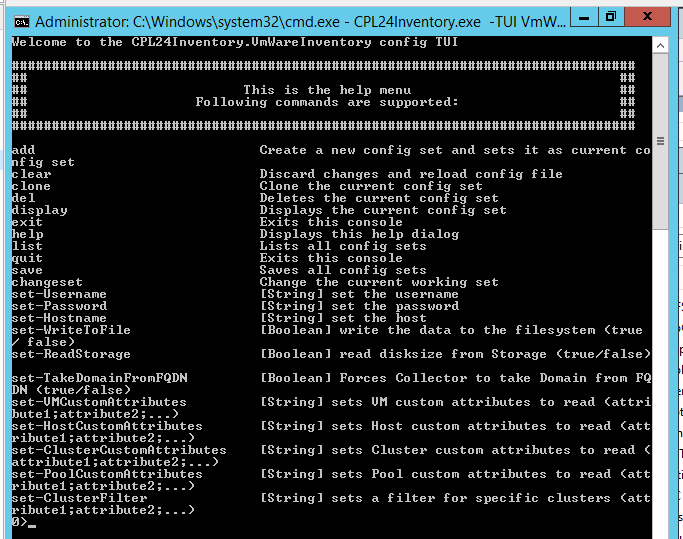
So we get VmWareInventory as available TUI. To start the configuration we have to call:
.\CPL24Inventory.exe -TUI VmWareInventoryNow we get the configuration TUI for VmWare
This is similar for every extension. Every extension has it’s own set of configuration commands.
Every extension supports so called configuration sets, so you are e. g. able to make a configuration set for every vCenter in your environment with different URLs and credentials.
You can use the commands add, clone, del and changeset to administrate your configurations.
Global TUI commands
| Command | Description |
|---|---|
| add | Create a new config set and sets it as current config setCreate a new config set and sets it as current config set |
| clear | Discard changes and reload config file |
| clone | Clone the current config set |
| del | Deletes the current config set |
| display | Displays the current config set |
| exit | Exits the console |
| help | Displays the help dialog |
| quit | Exits the console |
| save | Saves all config sets |
| changset | Change the current config set |
The protected config file can only be read out by the same account which was used for creation! So the account under where CPL24Inventory.exe is running must be the same as used for the TUI configuration. Normally CPL24Inventory.exe is running as “LOCAL SYSTEM”, so for an interactive TUI session as local system user use the tool psexec from Microsoft ([https://docs.microsoft.com/en-us/sysinternals/downloads/psexec]). So prior starting a TUI session start a interactive powershell process using psexec as local system: psexec.exe -s -i powershell.exe To check wether you are in the right context use $env:username and check that the output matches to COMPUTERNAME$
VMware
You have to pay attention that your “host”-vm has connectivity to the vCenter and you use the right user-context. If you use ScriptAgent-Server, this should be local system.
You should also have CPL24Invenotry.VmWareInventory.dll stored nearby CPL24Inventory.exe, default is %windir"%.
Beacause you’ve learned above, that you have to create a .pcfg-file with the user-context on which CPL24Inventory will be called, you’ll start with an administrative powershell and run
.\PsExec.exe -s -i powershell.exeIf you don’t have PsExec installed, you can download that from Microsoft
A new powershell instance will be opened. Please check, that the local system user is used:
$env:usernameNavigate to the location of your CPL24Inventory.exe and start the configuration with
.\CPL24Inventory.exe -TUI VmWareInventoryNow you should see an output like that

You are on dataset 0 now. You can add several datasets if you have more than one vCenter.
set-Hostname <hostname of vCenter like vcenter.mydomain.local>set-Username <username of eligible service-account>set-Password <pw of service-account>saveNow you have created your first dataset. If you want to add a second dataset, use add
Use quit when you are finished.